Tired of seeing ‘Your storage is full’ notification on your Android device? And when you want to install an app, it tells you to free up the storage? If yes, then you just have come to the right place. No one likes to see the storage is full notification on their Android device. Because, it doesn’t let you to several things like installing an app, downloading something on your device, etc when the storage is full. But don’t worry. Because, if you are facing this problem on your Android device, you can easily fix it. In this post, we’ll share some methods to free up storage on Android devices. So, read this post completely if you want to know how to do that.
There are several methods to free up storage on your Android device. such as playing free online car games instead of downloading them. If one method is not working for you, you can try the other method. Ultimately, you’ll end up cleaning the internal storage of your Android device, hence getting extra space on your device. So, it is important that you try every method described below and try to get as much storage on your device as possible. The process is simple. So, you don’t need your PC or Root your Android device to free up the storage.
Table of Contents
Why Android Storage Gets Filled Up?
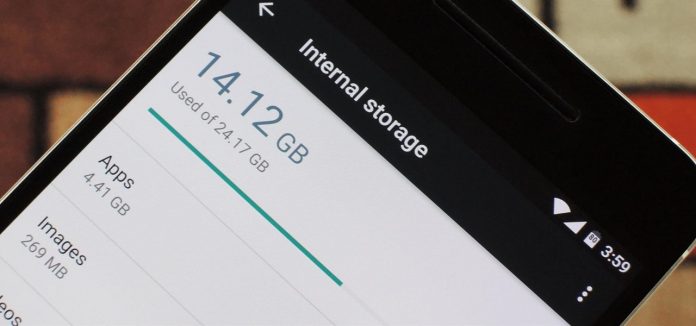
Well, there could be many reasons why the storage of your Android device is full. If you are using an Android device with less internal storage, then you probably have faced this issue. Because by time, the Internal storage of your Android device gets full. There could be junk files, big files, or just downloaded files in the Internal storage that fills your Internal storage. And this causes many problems on your device.
For example, when the storage is full, you can’t install new apps and games on your Android device from the Google Play Store. You also can’t take pictures and download files from the Internet if the storage is full. To do these things, you need to clean up the storage of your device so that you can install new apps on your Android device and get new files in the Internal storage of your device. You probably have noticed that the Android system takes a lot of internal storage on your device. And the size of free storage you get is really small on the devices that have low internal storage.
For many people, it’s a headache. They end up deleting important files from their device to store new files on their devices. But, let me tell you that there are methods that you can use to free up the storage of your device without deleting important files. However, some methods also require deleting files on your device. But, for that, alternatives are available. Overall, there are many methods are available that you can use to free up storage. You can choose your favorite method from below to free up the storage of your device. It’ll surely work for you.
How to Free Up Storage of Android Devices?
1. Use Android Clean Up App
There are some junk files and temporary files that take a lot of storage on your Android device. Usually, these files are cookies generated from different apps, download cache, temp files, etc. So, basically they are useless files. And you don’t need them on your Android device. To delete these kinds of files, you have to get an Android cleaner app on your device to clean up these junk files. This method is very effective as it deletes all the large-sized junk files from your device and gives you a lot of free space on your device.
There are many Android cleaners are available. Among them, you can use Files Go from Google to clean the space. Files Go is an official file manager cum storage cleaner app from Google that helps you to clean up the junk files from your device and gives you free space. It’s a completely free to download app and it’s pretty useful. Files Go is completely ad-free. So, you can just download, install this app on your Android device and start cleaning up space on your device.
How to Use Files Go to Free Up Storage on Android Devices?
- First of all, download the Files Go from Google and install it on your Android device.
- After installation, open the app.
- When you open the app for the first time, you’ll get a banner saying to clean the junk files from your Android device. Click on that.
- It’ll start scanning for the junk files on your device. Just wait until it finishes the scanning.
- After the scanning completes, you’ll get the options to clean the junk files. It’ll also estimate the junk file size. So, after cleaning them, you’ll get that much free storage. You can also select which junks should be cleaned and which not.

- Clean the junk files and that’s it. It’ll clean all the junk files, giving you some free storage on your device.
2. Move Apps to SD Card
Apps can take much storage on your Android device. If you have too many apps installed on your Android device, then there’s a chance that the apps are taking large-sized storage on your device. So, either you can delete useless apps from your device, or you can move the apps to the SD card. First, look for any useless app on your Android device that you don’t use. Sometimes, Android Bloatware takes space on your device. So, you should uninstall these kinds of apps immediately.
Then, you can move the apps to the SD card of your device and free up the storage. But, for that, you’ll need an external SD card on your device. So, just get an SD Card first if you want to free up the storage. An SD card will help you a lot freeing the app the storage of your device. Then just move the apps to the SD card using an app and you’ll get plenty of free storage on your device. Usually, when you install an app on your Android device, it gets installed on the Internal storage of your device, thus taking space on your device. So, without uninstalling these apps, you can move them to the SD card of your device and free up the storage easily.
How to Move Apps to the SD Card and Free Up Storage on Android?
- To free up the storage, first, download and install the Move Apps to SD Card app on your device. It is a quite popular app and works well on your Android device. This app will help you to free up your internal storage by moving the app data to an external SD card.
- Open the app on your Android device.
- Now, you’ve to choose the apps that you want to move to. You can select multiple apps at once to move then in your SD card and free up a lot of storage at once. It’ll also display the app’s size so that you can know how much free storage you are getting.
- After selecting the apps, just click on ‘Move’ to move the apps.
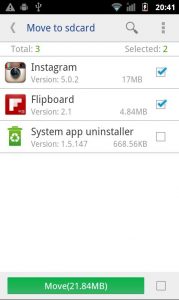
- It’ll start moving the apps. So, just wait until it finishes the process. After the process completes, you’ll notice that you’ve freed the storage up successfully.
3. Move Photos and Videos to SD Card/Cloud
When you click a photo on your Android device, it gets stored in the Internal storage of your device. As the photos are large in size, it fills up the Internal storage of your Android device. So, you should manage the photos properly on your Android device to get more storage. The best thing that you can do to manage the photos is, you can set a photo storage location to an external SD card from the camera app of your device.
By doing this, it’ll save all the future photos to the SD card and you’ll not face any storage full issue on your device. But what about the photos that are currently stored in the internal storage of your device? Well, for them, you can move those photos to the SD card manually, or you can backup them on Google Photos. For moving the photos to the SD card, you’ll just need a file manager app. Select the photos that you want to move, or you can just select the entire folder. Then move them to your SD card to free up the storage.
For backup, you can use Google Photos. Google Photos is a cloud photo platform from Google that lets you store photos in the cloud. You’ll get 15 GB of free storage with Google Photos that you can extend by buying a subscription. To manage the photos in Google Photos, just upload or sync the photos with your Google Account on Google Photos and they’ll be in the cloud storage of Google Photos. Then you can delete those photos from the galley and get a lot of free storage. But, before deleting the photos, make sure you have turned off the sync option so that the photos don’t get deleted from Google Photos itself.
4. Move Files to Google Drive
If you have large size files in the Internal storage of your Android device, then they’re taking a lot of storage on your device. So, the best thing that you can do to manage those files is, you can move them to the SD card and free up the storage of your Android device. If you have an external SD card on your device, it’s recommended that you store large size files in the SD card. It could be movies, video files, or any other files. Just move them from the Internal storage to the SD card, and you’ll get plenty of free storage.
If you don’t have an SD card on your Android device, then don’t worry. Because you can still move the files to free cloud storage like Google Drive. Usually, every Android device comes with the Google Drive app. So, you can just open the Google Drive app on your Android device and move the large files to the cloud storage. When you need the files, you can just open them from Google drive. The only problem with this method is, it requires an active Internet connection on your device.
5. Factory Reset Your Android Device
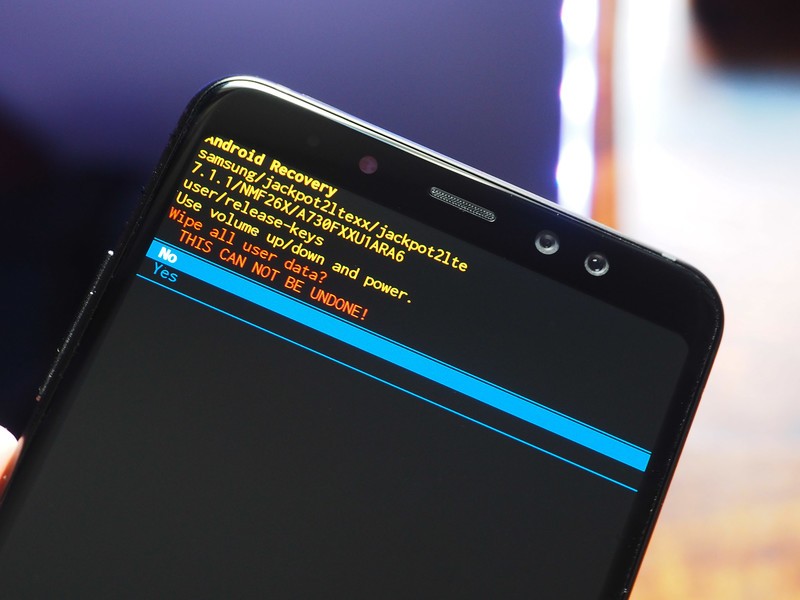
The last thing that you can do to free up the storage is, you can reset your Android device to factory defaults and clean your device completely. This method will work 100% and it’ll give you a lot of free storage. But, it comes with a cost. Because, when you choose to reset to factory defaults, it’ll delete all your data from your Android device including photos, files, contacts, apps, settings, etc. Basically, restoring your device means it’ll be like a new Android device.
If the above methods are not working for you, and you want more storage on your Android, resetting your device is probably the only way left. But, you can do one thing. You can move all your important files to cloud storage or backup them in your SD card or PC before restoring the settings. Then, you can restore, and later, you can get the files from the backup that you took. It’s one of the best options if you want to utilize the full storage of your Android device.
To restore the settings to defaults, you need to Go to Settings>Additional Settings>Backup & Reset>Erase All Data (Factory Settings) options and proceed to reset your device. Note that each Android smartphone has different reset options. So, you can just Google ‘How to reset device model’ and then watch the process of resetting your device. For contacts backup, you can just use your Google account to sync the contacts.
Read Also: DU Battery Saver Alternatives
Final Words
So, guys, I hope you found this post helpful. If you liked this post, you can share it on your social media platforms. Just use the share buttons below to share this post. If you have any questions or queries, you can ask them in the comment section below. You can also provide your feedback in the comment section.



![How to Fix Google Play Store Error 194 on Android Devices [2022] google play store error 194](https://cracktech.net/wp-content/uploads/2022/09/Fix-Google-Play-Store-Error-194-218x150.jpg)


![How to Unlock Bootloader without PC On Android [2022]](https://cracktech.net/wp-content/uploads/2019/02/unlock-boot.png)